I'm a sucker for Paula Deen. I freakin' love that lady and her deep southern accent and belly laugh. Watching her show reminds me of my summers going down to Tennesee and seeing my grandpa's family and eating at my family's favorite country bbq dive in TN, Lefty's! ;)
So, inpsired by my pin board I decided to make this pulled bbq chicken recipe. I'm always looking for ways to spice up chicken (a) b/c chicken is cheap and (b) b/c chicken is healthy (c) chicken is delicious!
So here it is!
Ingredients
2 pounds boneless skinless chicken thighs (I used 2 breasts for just Austin and I)
2 tablespoons canola oil
1 onion, finely chopped (used about 1/3 c. onion)
2 cloves garlic, finely chopped or couple TB of garlic seasoning
3 tablespoons apple cider vinegar
1 cup ketchup
½ cup water
2 tablespoons light brown sugar
1 tablespoon Worcestershire sauce
¼ teaspoon cayenne pepper
Kosher salt and freshly ground black pepper
6 whole-wheat hamburger rolls (used slimwhich buns...don't recommend since they're so thin they can't handle the juicy meat on them...found this out the hard way.)
Coleslaw, optional - recommend it! Its tasty!
Add In: 1/2 cup favorite bbq sauce 20 minutes into cooking process
Paula's Directions
Season the chicken thighs on both sides with salt and pepper. Heat oil in a large high-sided skillet over medium high heat. Once it shimmers, add the chicken thighs and sear until golden brown, about 4 minutes on each side. Remove to a plate. Add onion and garlic and sauté until tender, about 3 minutes. Stir in apple cider vinegar; using a wooden spoon stir up any browned bits on the bottom of the pan. Add ketchup, water, brown sugar, Worcestershire, cayenne, and salt and pepper. Bring to a boil then reduce to a simmer. Add the chicken back to the pan as well as any juices that have accumulated on the plate. Turn heat to low, cover and cook for 40 minutes.
Once chicken is cooked, shred the meat with a fork in the skillet. Toss the meat through the sauce so it’s covered. Divide the pulled meat between 6 hamburger buns. Serve alongside with some coleslaw, if desired.
Julianne's Directions
Instead of all the fuss on the stove, I'm a devout crock pot user. I got my mini crockpot out and simmered garlic and onions on high in there for about 15 minutes...meanwhile at 375 degrees I cooked my two chicken breasts in the oven for about 40 minutes on a cookie sheet. When the chicken is just about fully cooked, take it out and pull apart with fork and knife. Place chicken in the crock pot with onions and garlic. Add in the rest of the ingredients. I would add in about a half cup of your favorite bbq sauce about 20 minutes into the cooking process in the crockpot. The sauce Paula makes, is good but not thick enough. Simmer on high in crock pot for about an hour or until cooked thoroughly and flavors have blended together.
If you can't make it to your favorite southern dive, this hits the spot! Happy Cooking! :)
"A blog full of yummy food, budget home decor, and easy crafts to feed your creative soul."
Tuesday, March 6, 2012
Monday, February 13, 2012
Veggies and Bruchetta
For my birthday, I received some special home-made oils from my mom (sun dried tomatoe, herb infused, and chili oil). I wanted to try them out with a simple recipe. Decided to go with some roasted veggies in the oven (red skin potatoes, carrots, and broccoli). Olive oil marinaded chicken breasts pan seared to perfection. My favorite piece of this meal was the bruchetta. I got some dollar multi-grain french bread from Arnie's bakery, froze it for 3 weeks and am now using it! I use a combo of chopped (canned or fresh) tomatoes, Tastefully Simple SunDried Tomato Pesto mix, and parm cheese to make the topping. I top the bruchetta with Mozzarella cheese (the kind with Philadelphia Cream Cheese in it...yum!) Bake at 350 for about 20 minutes and oh so yummy!
Potatoes took the longest. I'd start them a good hour before the meal needs to be done. I chopped the redskins, washed them, and placed them on aluminum foil (recommend spraying the foil with cooking spray to prevent stickiness). Next, I drizzled the olive oil or herb oil over them, used some mixed spices (garlic, rosemary, salt, pepper to season) and popped them in the oven. These would be good with a little parmasean cheese on them. 1 hour roughly @ 400 degrees...I like them crispy so I keep them in when I put the rest of the veggies in the oven.
Pretty much the same seasoning combo on the carrots and brocoli. They only take about 30 minutes to bake @ 350.
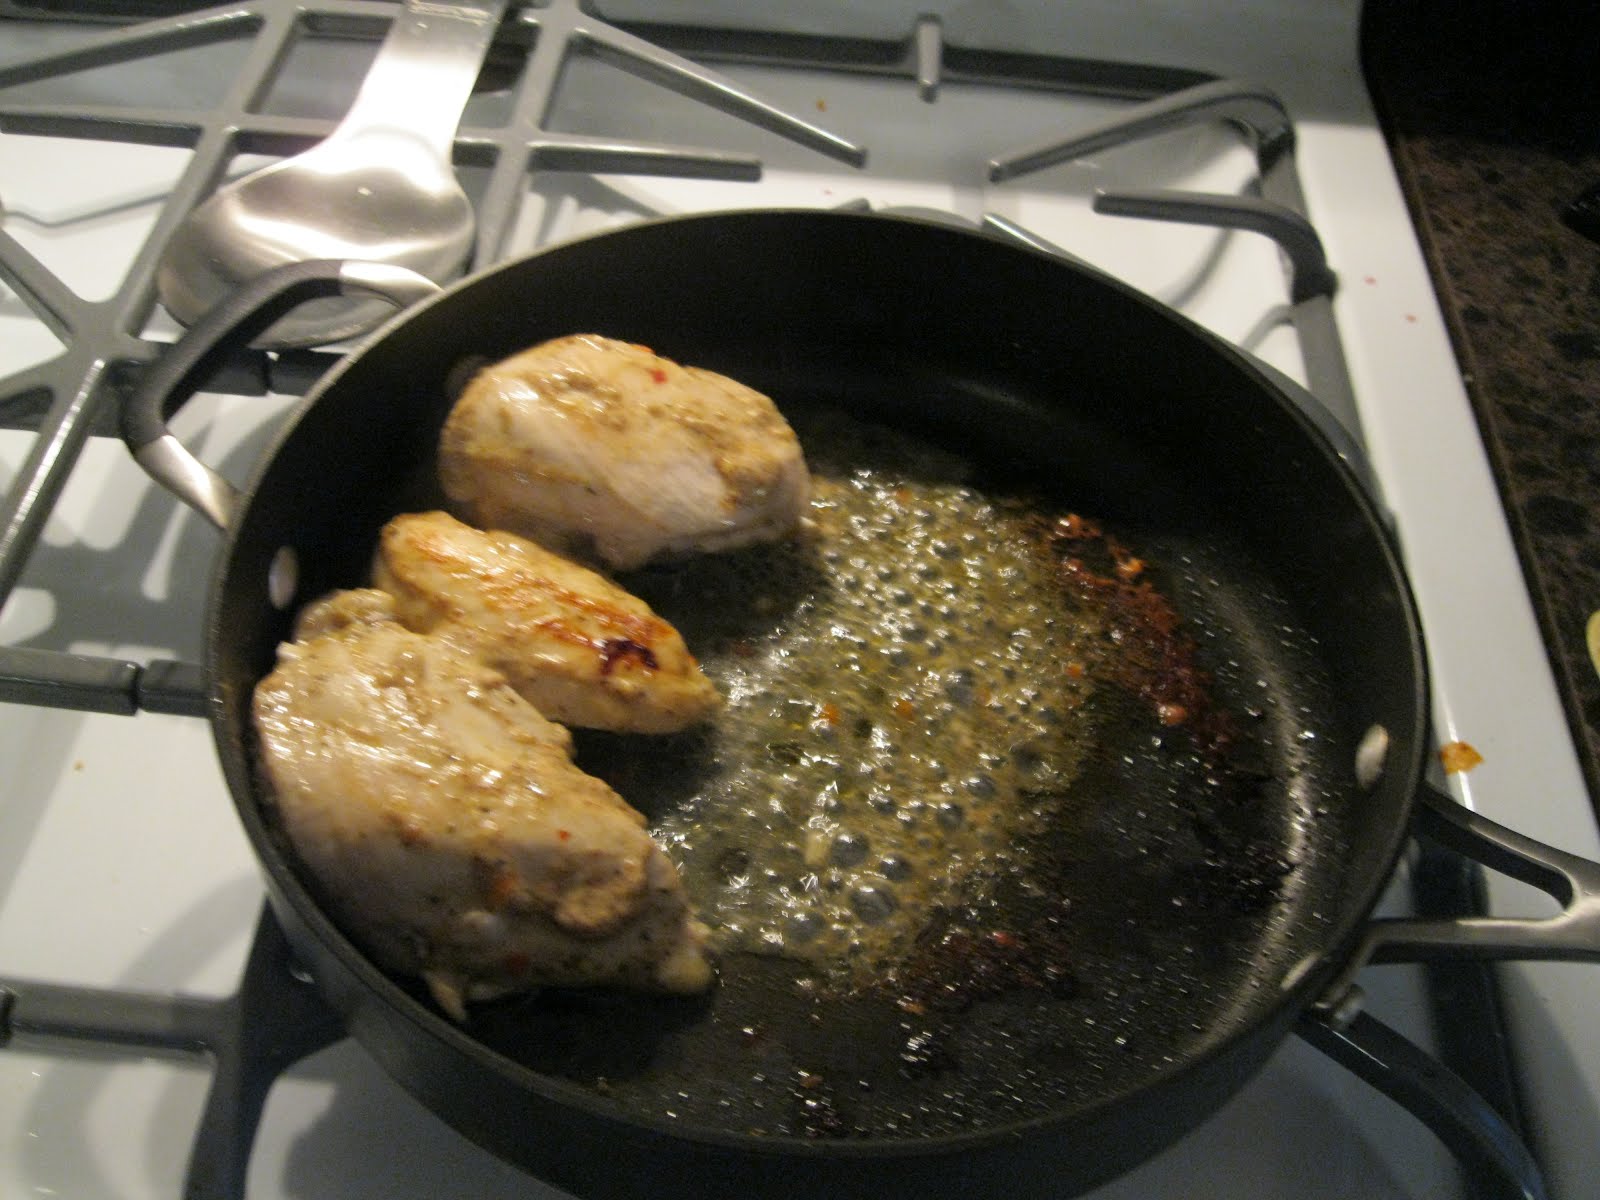
The chicken I marinated in Kraft olive oil dressing/marinade. I added a little Italian dressing too during the cooking process in the pan.
This is a delicious and easy meal...and pretty healthy too :)
Potatoes took the longest. I'd start them a good hour before the meal needs to be done. I chopped the redskins, washed them, and placed them on aluminum foil (recommend spraying the foil with cooking spray to prevent stickiness). Next, I drizzled the olive oil or herb oil over them, used some mixed spices (garlic, rosemary, salt, pepper to season) and popped them in the oven. These would be good with a little parmasean cheese on them. 1 hour roughly @ 400 degrees...I like them crispy so I keep them in when I put the rest of the veggies in the oven.
Pretty much the same seasoning combo on the carrots and brocoli. They only take about 30 minutes to bake @ 350.
The chicken I marinated in Kraft olive oil dressing/marinade. I added a little Italian dressing too during the cooking process in the pan.
This is a delicious and easy meal...and pretty healthy too :)
Tuesday, February 7, 2012
"L"ove Monogramed Wreaths! DIY project
I have alwayed LOVED the Monogramed wreaths on Pinterest and other DIY blogs...and got inspired to make one for myself. My front door needed a change from the wintery Christmas wreath!
I copied a wreath off of Pinterest, but also followed a blog I really like. Check this girl's site out for instructions and more fun projects! She gives way better instructions than I ever could!
Basic instructions:
Here's what you'll need:
12" paper mache letter ($2.50 from JoAnn with 40% off coupon-- love those!)
2 rolls of jute twine ($1.64 each from Walmart)
felt ($.44 each from JoAnn Fabric)
ribbon (You pick colors/style!)
glue gun
scissors
(finished product)
(Apologies for the poor picture quality- these last two were taken on my phone)
(while wrapping...it takes about two layers going the opposite way to cover the letter...which takes about an hour and a half to complete, but really easy! I just watched t.v while I did it!)
A fun project and gift!
Things to note when doing this...
1)wrap jute 2x's around the opposite way securing with hot glue occasionally
2) if you have a unsymmetrical letter of the alphabet..make sure you stick your letter to the door with some puddy or a sticky wall hanger because it likely won't sit nice! My "L" was hanging lopsided for a while until I tacked it down.
I copied a wreath off of Pinterest, but also followed a blog I really like. Check this girl's site out for instructions and more fun projects! She gives way better instructions than I ever could!
Basic instructions:
Here's what you'll need:
12" paper mache letter ($2.50 from JoAnn with 40% off coupon-- love those!)
2 rolls of jute twine ($1.64 each from Walmart)
felt ($.44 each from JoAnn Fabric)
ribbon (You pick colors/style!)
glue gun
scissors
(finished product)
(Apologies for the poor picture quality- these last two were taken on my phone)
(while wrapping...it takes about two layers going the opposite way to cover the letter...which takes about an hour and a half to complete, but really easy! I just watched t.v while I did it!)
A fun project and gift!
Things to note when doing this...
1)wrap jute 2x's around the opposite way securing with hot glue occasionally
2) if you have a unsymmetrical letter of the alphabet..make sure you stick your letter to the door with some puddy or a sticky wall hanger because it likely won't sit nice! My "L" was hanging lopsided for a while until I tacked it down.
Monday, January 16, 2012
Baja Fish Tacos- finger lickin' good...
Today, I was SO pumped to try this recipe inspired from the cooking blog "The Paupered Chef". I came home from work, gym and grocery ready to whip up some deliciousness. I absolutely LOVE fish tacos...I order them every time I go to places like "On the Border". Literally, this recipe gives "On the Border" a run for their money in the fish taco department! Its the sauce that makes everything come together too...
Part I THE SAUCE (indicates substitutions or changes in my recipe)
fresh lime juice (or any citris juice really...I used lemon and orange juice squeeze)
½ cup yogurt (non fat or low fat plain yogurt- for a healthy substitute)
½ cup mayonnaise (miracle whip)
1 habenero chili (use a milder one if you wish, I used about a tablespoon of green chiles and diced tomatoes from a can)
½ teaspoon - crushed oregano
½ teaspoon - ground cumin
½ teaspoon - dried, crushed dill
½ teaspoon - ground cayenne chile
ground white pepper (or black) to taste - I also added about a TB of cilantro...always a good addition to Mexican inspired dishes.
First mix the first three ingredients, aiming for a slightly runny consistency. Dice the chili and finely as possible and add it along with the remaining ingredients. Watch out for the habeneros, they can knock your tongue for a loop.
PART II: THE FISH
Many suggest using cod; we decided on the somewhat cheaper tilapia since it looked gorgeous at the store and it's a nice manageable size for our purposes. Regardless, get it into 1-inch wide strips (I did chunks...I'm not sure why but I thought it would work better!).
Beer batter is pretty easy to make. I have McCormick beer batter mix so I combined that with my beer following the directions. However you can make a simple beer batter from the following recipe too!
1 cup flour
2 teaspoons salt
1 beer, not dark
Combine flour and salt, then add beer. Above you can get a sense of the consistency. It's rather goopy, which was nice since the batter actually stayed on the fish when we fried it.
Get a big pan with a thick lip and put enough oil so it's about an inch thick. Turn the heat up to medium-high. All the recipes gave a specific temperature, but I don't have a thermometer, so it was just a guessing game. Make sure it's not on high or it will start to smoke and all chaos will break out. Do a test run with one piece of fish, and when it's ready it will turn a golden brown. Keep a close eye on the frying process, turning several times until fried on all sides (about 5-10 minute process).
(Left Back) - Cabbage and Romaine mix (Right Back) Chef's special sauce (Front) Beer Batter mix
Toasted shells and fried tilapia out to dry on paper towel...
Toasting the shells...also key. Cilantro rice is simply white rice, seasoned with cilantro, cumin, garlic salt and pepper...you can add some lime juice for extra flavor as well.
ALL DONE! Whole wheat soft shell, cabbage and romaine, beer battered fish, cilantro lime rice, and chef's special sauce....perfecto! And we couldn't get enough...I even ate the rest of Austin's. Literally it was one of those recipes you're like...holy crap that was amazing! Craving more! Definitely will be making this dish again! It would be a great dish for a summer party paired with some sangria or cold beers :)
Original Recipe found at : http://thepauperedchef.com/2006/06/baja_fish_tacos.html
Part I THE SAUCE (indicates substitutions or changes in my recipe)
fresh lime juice (or any citris juice really...I used lemon and orange juice squeeze)
½ cup yogurt (non fat or low fat plain yogurt- for a healthy substitute)
½ cup mayonnaise (miracle whip)
1 habenero chili (use a milder one if you wish, I used about a tablespoon of green chiles and diced tomatoes from a can)
½ teaspoon - crushed oregano
½ teaspoon - ground cumin
½ teaspoon - dried, crushed dill
½ teaspoon - ground cayenne chile
ground white pepper (or black) to taste - I also added about a TB of cilantro...always a good addition to Mexican inspired dishes.
First mix the first three ingredients, aiming for a slightly runny consistency. Dice the chili and finely as possible and add it along with the remaining ingredients. Watch out for the habeneros, they can knock your tongue for a loop.
PART II: THE FISH
Many suggest using cod; we decided on the somewhat cheaper tilapia since it looked gorgeous at the store and it's a nice manageable size for our purposes. Regardless, get it into 1-inch wide strips (I did chunks...I'm not sure why but I thought it would work better!).
Beer batter is pretty easy to make. I have McCormick beer batter mix so I combined that with my beer following the directions. However you can make a simple beer batter from the following recipe too!
1 cup flour
2 teaspoons salt
1 beer, not dark
Combine flour and salt, then add beer. Above you can get a sense of the consistency. It's rather goopy, which was nice since the batter actually stayed on the fish when we fried it.
Get a big pan with a thick lip and put enough oil so it's about an inch thick. Turn the heat up to medium-high. All the recipes gave a specific temperature, but I don't have a thermometer, so it was just a guessing game. Make sure it's not on high or it will start to smoke and all chaos will break out. Do a test run with one piece of fish, and when it's ready it will turn a golden brown. Keep a close eye on the frying process, turning several times until fried on all sides (about 5-10 minute process).
(Left Back) - Cabbage and Romaine mix (Right Back) Chef's special sauce (Front) Beer Batter mix
Toasted shells and fried tilapia out to dry on paper towel...
Toasting the shells...also key. Cilantro rice is simply white rice, seasoned with cilantro, cumin, garlic salt and pepper...you can add some lime juice for extra flavor as well.
ALL DONE! Whole wheat soft shell, cabbage and romaine, beer battered fish, cilantro lime rice, and chef's special sauce....perfecto! And we couldn't get enough...I even ate the rest of Austin's. Literally it was one of those recipes you're like...holy crap that was amazing! Craving more! Definitely will be making this dish again! It would be a great dish for a summer party paired with some sangria or cold beers :)
Original Recipe found at : http://thepauperedchef.com/2006/06/baja_fish_tacos.html
Saturday, January 14, 2012
Chicken Parmesan Rollatini
So this recipe is adapted from the food network's Chicken Parmesan Rollatini....yes the name sounds good and the recipe is even better! So for a weeknight meal under 10 bucks...this one is a winner for sure. I made a few adaptions and changes for the sake of what I was comfortable with in my kitchen and it turned out pretty tasty!
(added some mac and cheese and brocolli for color as the side dishes...yum!)
Ingredients
1 cup fat-free low-sodium chicken broth
1 clove garlic, thinly sliced
1 14.5-ounce can crushed San Marzano or fire-roasted tomatoes 5 or 6 fresh basil leaves, torn into small pieces -> Julianne's change: I used a can of whole tomatoes and smashed them and added my own spice mix of oregano, parsley, and basil to the mix...turned out just as good)
salt and freshly ground pepper (or not fresh pepper...hello its okay to cook without fresh seasonings!)
4 thin (1/8-inch-thick) chicken cutlets (4 ounces each)- (we used two large thawed boneless chicken breasts..)
1/4 cup chopped fresh parsley - (or dried)
6 ounces shredded part-skim mozzarella cheese (about 1 cup)
1/4 cup grated parmesan cheese
1/4 cup breadcrumbs (we used panko bread crumbs)
1 large egg white (out of eggs- used milk)
Cooking spray
Instant polenta, for serving (optional) (I didn't use this)
Directions
Position a rack in the upper third of the oven and preheat to 450 degrees F. Cook the broth, garlic, tomatoes and Italian seasonings (basil, oregano, and parsley to taste) in a skillet or pot over medium-high heat, stirring occasionally, until slightly thickened, about 15 minutes. Season with salt and pepper. Cover to keep warm.
If chicken is very thick, flatten it out (I use my kitchen "hammer" as I like to call it). Season the chicken with salt and pepper; place smooth-side down on a work surface. Sprinkle with the parsley and mozzarella. Starting at the short end, roll up to enclose the filling. Secure with a toothpick (I was out of these so I folded the chicken up without securing).
Mix the parmesan and breadcrumbs in a shallow dish. Put the egg white in another dish and beat until foamy.
Mist a cast-iron skillet (or use a glass dish 9X13) with cooking spray (I added some butter to the bottom of the glass pan). Dip the chicken rolls in the egg white (or milk), then coat with the breadcrumb mixture. Place in the skillet, seam-side down. Sprinkle with any remaining breadcrumbs and mist with cooking spray. Bake until cooked through, about 20 minutes. Serve with the tomato sauce, and polenta, if desired.
Such a delicious meal. My husband said, "Yep, you can add that into the monthly rotation, Dear". HA! I love love love Italian based recipes and finding new ways to cook it in healthier ways. This recipe was actually one I came up with while searching for healthy dinner options. Below is the nutrition information. Happy Cooking!
Per serving: Calories 355; Fat 14 g (Saturated 7 g); Cholesterol 105 mg; Sodium 848 mg; Carbohydrate 15 g; Fiber 2 g; Protein 44 g
(added some mac and cheese and brocolli for color as the side dishes...yum!)
Ingredients
1 cup fat-free low-sodium chicken broth
1 clove garlic, thinly sliced
1 14.5-ounce can crushed San Marzano or fire-roasted tomatoes 5 or 6 fresh basil leaves, torn into small pieces -> Julianne's change: I used a can of whole tomatoes and smashed them and added my own spice mix of oregano, parsley, and basil to the mix...turned out just as good)
salt and freshly ground pepper (or not fresh pepper...hello its okay to cook without fresh seasonings!)
4 thin (1/8-inch-thick) chicken cutlets (4 ounces each)- (we used two large thawed boneless chicken breasts..)
1/4 cup chopped fresh parsley - (or dried)
6 ounces shredded part-skim mozzarella cheese (about 1 cup)
1/4 cup grated parmesan cheese
1/4 cup breadcrumbs (we used panko bread crumbs)
1 large egg white (out of eggs- used milk)
Cooking spray
Instant polenta, for serving (optional) (I didn't use this)
Directions
Position a rack in the upper third of the oven and preheat to 450 degrees F. Cook the broth, garlic, tomatoes and Italian seasonings (basil, oregano, and parsley to taste) in a skillet or pot over medium-high heat, stirring occasionally, until slightly thickened, about 15 minutes. Season with salt and pepper. Cover to keep warm.
If chicken is very thick, flatten it out (I use my kitchen "hammer" as I like to call it). Season the chicken with salt and pepper; place smooth-side down on a work surface. Sprinkle with the parsley and mozzarella. Starting at the short end, roll up to enclose the filling. Secure with a toothpick (I was out of these so I folded the chicken up without securing).
Mix the parmesan and breadcrumbs in a shallow dish. Put the egg white in another dish and beat until foamy.
Mist a cast-iron skillet (or use a glass dish 9X13) with cooking spray (I added some butter to the bottom of the glass pan). Dip the chicken rolls in the egg white (or milk), then coat with the breadcrumb mixture. Place in the skillet, seam-side down. Sprinkle with any remaining breadcrumbs and mist with cooking spray. Bake until cooked through, about 20 minutes. Serve with the tomato sauce, and polenta, if desired.
Such a delicious meal. My husband said, "Yep, you can add that into the monthly rotation, Dear". HA! I love love love Italian based recipes and finding new ways to cook it in healthier ways. This recipe was actually one I came up with while searching for healthy dinner options. Below is the nutrition information. Happy Cooking!
Per serving: Calories 355; Fat 14 g (Saturated 7 g); Cholesterol 105 mg; Sodium 848 mg; Carbohydrate 15 g; Fiber 2 g; Protein 44 g
Wednesday, January 4, 2012
New Years Reflection
This year has absolutely flown by! I can't believe I went from a girlfriend, to fiance, to a bride, and a wife all in one year! However, I wouldn't have had it any other way. Austin and I definitely would not be where we are today without the help and support of our amazing families.
So, I did end up sending out Christmas cards, but unfortunately did not order nearly enough. So I took a picture, and to those who did not get one...here is your virtual card ;)
Next year, I will attach a letter to update what went on in our lives, but for now a quick summary will have to do!
On January 21, Austin asked me to marry him. It was one of happiest memories I have, and a day I won't forget. Immediately, I began wedding planning. I think I had everything important booked, my dress ordered, and a lot of the details organized within a months time. Surprisingly, ;) I only had seven years to plan, right?!
Through this year, I have continued my journey through graduate school at Spring Arbor University in Grand Rapids for my Masters in Counseling. I graduate in 2013, and begin my internship the summer of 2012. I could not be more excited to be done! I hope to practice with children and adolescents in the field of mental health. I was also promoted to begin case management for Wedgwood in March of 2011. I have continued this new position and enjoyed the chance to practically implement what I am learning in school into my workplace.
Austin continues at Weller Truck Company in the Accounting and Business Office. He enjoys what he does there, and has been there since November 2010.
In April of 2011, we began house hunting. We finally closed on our first home, a condo in Byron Center, in May of 2011. Austin moved in immediately after we closed in June, and I moved in after we were married. We love living in our little condo. Its about 10-20 minutes to both sets of parents, our church, and our workplaces.
From June until August, it was a rush of events for us as a couple. Events such as several bridal showers, pre-marital counseling, weddings, etc. I even took up the challenge of participating in my first (maybe only) sprint triathlon (800 meter swim, 15 mile bike, and 3 mile run) in June. It was a huge accomplishment for me, and I was happy to be able to say I did it after training for months for it. My whole family came out to support me. It was quite the event, and I was really proud to be able to follow through with that goal.
Finally, August rolled around. We were married on August 12, 2011. It was a wonderful day, but it went by way too fast! We are glad we got a video of the day in order to look back on it to remember what seemed like a thirty minute event. We left immediately for our honeymoon to Riviera Mya, Mexico. We had a great time and found Mexico is EXTREMELY hot in August. The pool was our best friend during that trip.
From September to December 2011, Austin and I have been enjoying married life and working a lot. We have been attending Corinth Reformed Church on a regular basis since 2009. We plan to officially join, and Austin will make profession of faith in January 2012. We're excited for this change and are excited to see where God leads us there. Also, for me, being married has brought out my love of cooking and food! I love to cook and create things in the kitchen, as you probably well know if you follow this blog ;) Keeping a blog has inspired me in a way that has been lacking since I got done with college and soccer. Not playing soccer anymore has opened up other avenues such as training and running 5k's and triathlons as well as creating this blog. I am able to try new things and test my recipes on my husband, a gift and a curse as he says ;).
Okay- that's more than a quick summary, huh? :) Anyway, we look forward to 2012 and what God has in store!
So, I did end up sending out Christmas cards, but unfortunately did not order nearly enough. So I took a picture, and to those who did not get one...here is your virtual card ;)
Next year, I will attach a letter to update what went on in our lives, but for now a quick summary will have to do!
On January 21, Austin asked me to marry him. It was one of happiest memories I have, and a day I won't forget. Immediately, I began wedding planning. I think I had everything important booked, my dress ordered, and a lot of the details organized within a months time. Surprisingly, ;) I only had seven years to plan, right?!
Through this year, I have continued my journey through graduate school at Spring Arbor University in Grand Rapids for my Masters in Counseling. I graduate in 2013, and begin my internship the summer of 2012. I could not be more excited to be done! I hope to practice with children and adolescents in the field of mental health. I was also promoted to begin case management for Wedgwood in March of 2011. I have continued this new position and enjoyed the chance to practically implement what I am learning in school into my workplace.
Austin continues at Weller Truck Company in the Accounting and Business Office. He enjoys what he does there, and has been there since November 2010.
In April of 2011, we began house hunting. We finally closed on our first home, a condo in Byron Center, in May of 2011. Austin moved in immediately after we closed in June, and I moved in after we were married. We love living in our little condo. Its about 10-20 minutes to both sets of parents, our church, and our workplaces.
From June until August, it was a rush of events for us as a couple. Events such as several bridal showers, pre-marital counseling, weddings, etc. I even took up the challenge of participating in my first (maybe only) sprint triathlon (800 meter swim, 15 mile bike, and 3 mile run) in June. It was a huge accomplishment for me, and I was happy to be able to say I did it after training for months for it. My whole family came out to support me. It was quite the event, and I was really proud to be able to follow through with that goal.
Finally, August rolled around. We were married on August 12, 2011. It was a wonderful day, but it went by way too fast! We are glad we got a video of the day in order to look back on it to remember what seemed like a thirty minute event. We left immediately for our honeymoon to Riviera Mya, Mexico. We had a great time and found Mexico is EXTREMELY hot in August. The pool was our best friend during that trip.
From September to December 2011, Austin and I have been enjoying married life and working a lot. We have been attending Corinth Reformed Church on a regular basis since 2009. We plan to officially join, and Austin will make profession of faith in January 2012. We're excited for this change and are excited to see where God leads us there. Also, for me, being married has brought out my love of cooking and food! I love to cook and create things in the kitchen, as you probably well know if you follow this blog ;) Keeping a blog has inspired me in a way that has been lacking since I got done with college and soccer. Not playing soccer anymore has opened up other avenues such as training and running 5k's and triathlons as well as creating this blog. I am able to try new things and test my recipes on my husband, a gift and a curse as he says ;).
Okay- that's more than a quick summary, huh? :) Anyway, we look forward to 2012 and what God has in store!
Tuesday, January 3, 2012
Cranberry Hootycreeks - Weird Name...Awesome Cookie! or as a GIFT!
These cookies are fantastic and, I must say, addicting! I made them a couple times over the holidays and family and friends really enjoyed them. They're fun to make too- EASY!
Recipe:
Ingredients
5/8 cup all-purpose flour
1/2 cup rolled oats
1/2 cup all-purpose flour
1/2 teaspoon baking soda
1/2 teaspoon salt
1/3 cup packed brown sugar
1/3 cup white sugar
1/2 cup dried cranberries
1/2 cup white chocolate chips
1/2 cup chopped pecans (optional - I dislike nuts so I used a few more cranberries and white chocolate chips :)
Directions
For Cookies in a Jar:
Layer the ingredients in a 1 quart or 1 liter jar, in the order listed.
Attach a tag with the following instructions: Cranberry Hootycreeks 1. Preheat oven to 350 degrees F (175 degrees C). Grease a cookie sheet or line with parchment paper. 2. In a medium bowl, beat together 1/2 cup softened butter, 1 egg and 1 teaspoon of vanilla until fluffy. Add the entire jar of ingredients, and mix together by hand until well blended. Drop by heaping spoonfuls onto the prepared baking sheets. 3. Bake for 8 to 10 minutes, or until edges start to brown. Cool on baking sheets, or remove to cool on wire racks.
For making cookies: dump all dry ingredients in mixing bowl and follow the same instructions. These make about 15-20 cookies depending on how big of cookie balls you make :) They're so good!
Recipe:
Ingredients
5/8 cup all-purpose flour
1/2 cup rolled oats
1/2 cup all-purpose flour
1/2 teaspoon baking soda
1/2 teaspoon salt
1/3 cup packed brown sugar
1/3 cup white sugar
1/2 cup dried cranberries
1/2 cup white chocolate chips
1/2 cup chopped pecans (optional - I dislike nuts so I used a few more cranberries and white chocolate chips :)
Directions
For Cookies in a Jar:
Layer the ingredients in a 1 quart or 1 liter jar, in the order listed.
Attach a tag with the following instructions: Cranberry Hootycreeks 1. Preheat oven to 350 degrees F (175 degrees C). Grease a cookie sheet or line with parchment paper. 2. In a medium bowl, beat together 1/2 cup softened butter, 1 egg and 1 teaspoon of vanilla until fluffy. Add the entire jar of ingredients, and mix together by hand until well blended. Drop by heaping spoonfuls onto the prepared baking sheets. 3. Bake for 8 to 10 minutes, or until edges start to brown. Cool on baking sheets, or remove to cool on wire racks.
For making cookies: dump all dry ingredients in mixing bowl and follow the same instructions. These make about 15-20 cookies depending on how big of cookie balls you make :) They're so good!
Subscribe to:
Posts (Atom)